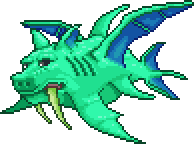
Duke Fishron
Duke Fishron is the most challenging optional boss in Hardmode — 60,000 HP, three-phase transformation, and Phase 3 invisible teleport dashes. He can be summoned any time in Hardmode, but his real difficulty slots in after Golem. 1.4.5 adds the Electric Eel weapon and shifts drop rates from 1/5 to 1/6. His drops carry you all the way to Moon Lord.
Quick Guide
Equipment


Shroomite (Ranger) / Beetle (Melee) / Spectre (Mage) / Spooky (Summoner) — Post-Plantera/Post-Golem tier armor. Beetle Shell variant gives up to 45% damage reduction. Spectre Hood provides lifesteal.
Arena Setup
3-5 Platform Layers
50-tile vertical spacing between each layer (Cthulhunado is 58 tiles tall — any less and it clips the layer above)
200-400 Tiles Wide
Cover the entire Ocean biome. Leave the biome and he enrages — do not risk it.
Asphalt Runway on Bottom
Bottom layer uses Asphalt Blocks for sprint speed. Upper layers must be platforms for vertical movement.

Campfire
Life Regen — +1 HP/sec recovery

Heart Lantern
Life Regen — Stacks with Campfire for +2 HP/sec

Honey Pool
Rapid Healing — 30-second regen buff on contact

Star in a Bottle
Mana Regen — Essential for Mage builds

Sunflower
Happy! — +10% movement speed
Summoning

Strategy
Top Priority — 60,000 HP + three-phase transformation + Phase 3 has 0 defense but invisible teleport dashes
- 1Build 3-5 platform layers above the Ocean, 50-tile spacing (Cthulhunado is 58 tiles tall)
- 2Inferno Potion is mandatory — fire ring auto-pops bubbles, nearly eliminates the bubble threat
- 3Phase 1 charges target your current position — move vertically the instant he lunges
- 4Phase 2: deliberately drag Cthulhunados to arena edges to keep the center clear
- 5Phase 3: memorize the 1-2-3 dash rhythm, use Shield of Cthulhu counter-dash for i-frames
Combat Phases
Cycle: 5 charges → 21 bubbles → 5 charges → Sharknado (29 tiles tall). Defense 50, predictable rhythm. Inferno Potion fire ring auto-pops bubbles.
Charges drop to 3 per set but faster (~1 second delay). Bubbles upgrade to 31 in a circling barrage. Cthulhunado: 58 tiles tall, 14 seconds, 12 Sharkrons. Defense drops to 40.
Invisible teleport dashes — only glowing eyes visible. Fixed 1-2-3 dash cycle. Defense drops to 0 — the highest-damage and most lethal phase of the fight. Shield of Cthulhu counter-dash for i-frames.
Behavior
Fixed cycle: 5 charges → 21 Detonating Bubbles → 5 charges → Sharknado (29 tiles tall, lasts 9 seconds, spawns 6 Sharkrons each). Charges target your current position — move vertically the instant he starts his lunge. Bubbles pop in one hit from anything — Inferno Potion fire ring auto-destroys them.
Charges drop to 3 per set but get faster, with roughly 1-second delay between each. Bubbles upgrade to 31 per wave in a circling pattern. Sharknadoes become tracking bubbles that spawn Cthulhunados directly below you — 58 tiles tall, 23 tiles wide, 14 seconds, launching 12 Sharkrons. Bubbles above 95 tiles from the ground detonate overhead. Defense drops to 40 while damage and speed ramp up hard.
Background shifts to deep blue fog. Duke Fishron goes nearly invisible — only his glowing eyes remain. He drops all ranged attacks and only dashes. Fixed pattern: teleport → 1 dash → teleport to opposite side → 2 dashes → teleport to opposite side → 3 dashes → cycle resets. Defense hits 0 — this is his most vulnerable phase and also the deadliest. Shield of Cthulhu dash into his charges to trigger i-frames.
Special Techniques
Class Strategies
Ranger
Easiest — homing bullets perfectly solve Phase 3 invisibilityThe easiest pick. Chlorophyte Bullets auto-home the entire fight — just focus on dodging. Shroomite Armor stealth gives bonus damage reduction.
Megashark/Chain Gun + Chlorophyte Bullets / Tactical Shotgun Shroomite Armor (matching helmet for your weapon type)
- Megashark/Chain Gun + Chlorophyte Bullets for full auto-homing — Phase 3 invisibility solved
- Phase 1: swap to Daedalus Stormbow + Holy Arrows for raw burst DPS
- Phase 2: Tactical Shotgun for close-range burst damage
- Shroomite Armor activates stealth after 1.5 seconds still — bonus 20% DR
Melee
Hard — you need ranged melee weapons to keep distance, getting close is suicideTankiest but hardest to deal damage. Use ranged melee weapons to keep distance. Beetle Shell variant gives up to 45% DR to brute-force hits.

 Influx Waver / Terra Blade / Possessed HatchetBeetle Armor (Beetle Shell variant)
- Influx Waver/Terra Blade sword beams are your primary ranged damage
- Possessed Hatchet auto-homes on return, solid for Phase 3
- Vampire Knives as a lifesteal swap when HP gets low
- Apply Ichor with Flask of Ichor the entire fight — minus 15 defense is huge
Mage
Moderate — Ichor debuff is a big edge, Spectre lifesteal adds forgiveness, but mana pressure is realStrong sustained DPS. Spectre Hood lifesteal massively boosts survivability. Lead with Ichor debuff then swap to your main damage weapon.

 Golden Shower (debuff) / Razorpine / Bat ScepterSpectre Armor (Mask for DPS / Hood for lifesteal swap)
- Lead with Golden Shower to apply Ichor — minus 15 defense is a massive DPS increase
- Main DPS with Razorpine or Bat Scepter
- Spectre Hood lifesteal can save you in Phase 3 — swap when HP gets critical
- Mana Flower ensures uninterrupted casting
Summoner
Hardest — DPS depends on minions, Phase 3 teleport causes minions to lose targetMinions handle DPS, you focus 100% on dodging. Phase 3 minions lose tracking on teleport — direct whip hits are more reliable.

 Xeno Staff / Dark Harvest / Electric Eel
 Spooky Armor (Pumpkin Moon) / Tiki Armor (Witch Doctor)
- Xeno Staff UFO minions teleport-track targets — best option against Duke Fishron
- Phase 3: minions may lose target on teleport — rely on whip burst damage
- Spooky Armor provides maximum summon damage output
- If you have Electric Eel (second kill onward), chain lightning shreds Sharkrons
Common Mistakes
Cause: Not knowing Phase 3 has a fixed dash pattern — the triple dash catches you off guard
Memorize the rhythm: 1 dash → 2 dashes → 3 dashes → reset. Go full evasion during the triple dash, no DPS greed. Shield of Cthulhu counter-dash for i-frames.
Cause: Cthulhunados are 58 tiles tall and last 14 seconds — without positioning control they fill the arena
During Phase 2, deliberately move toward arena edges when dashes happen so Cthulhunados spawn at the sides. Then retreat to the opposite side for open space.
Cause: Going past ~400 tiles from map edge horizontally or entering underground/space layer vertically
Mark arena boundaries with solid blocks. Do not fly into the Space layer — reduced gravity turns you into a sitting duck.
Cause: Not using Inferno Potion, manually popping bubbles divides your attention
Inferno Potion fire ring auto-destroys nearby bubbles. This is the most underrated potion for this fight — it nearly eliminates the entire bubble threat.
Cause: Phase 3 has 0 defense but the longer it lasts, the more teleport cycles you eat — death probability climbs with every cycle
Phase 3 defense is 0, so stack all damage. Use burst weapons (Tactical Shotgun, Terra Blade beam) instead of homing — teleporting makes homing weapons lag behind.
Preparation Checklist
Drops

Fires 5 arrows per shot, consumes only 1. Best bow until Lunar Events.

Homing water discs that orbit enemies. Top-tier magic weapon.

Melee flail with dual modes (thrown/launched) added in 1.4.5.

Summons Sharknado minions. Best summon weapon before Lunar Events.

Low-cost rapid-fire with spread pattern.

New in 1.4.5. 150-damage whip with shock tag — chain lightning shreds multi-target scenarios.

6.67% drop rate (Master 10%). 3-second flight, 143-tile height, full speed in water.
After the Battle
With Duke Fishron gear, Golem, Pumpkin Moon, Frost Moon, and Martian Madness all become much more manageable.
Boss Progression

FAQ
QHow do you dodge the Phase 3 1-2-3 dashes from Duke Fishron?
The Phase 3 dash pattern is completely fixed: teleport diagonally above you → 1 dash → teleport to the opposite side → 2 dashes → teleport to the opposite side → 3 dashes → cycle resets. The single dash gap is your DPS window. The double dash requires evasion prep. The triple dash means full escape, no damage greed. Counter-dash into his charge direction with Shield of Cthulhu to trigger i-frames — this is the core Phase 3 survival mechanic. Wings with Frog Leg let you rapidly reposition vertically between each teleport.
QHow do you farm Truffle Worms? Any tips to boost spawn rates?
Truffle Worms only spawn in Underground Glowing Mushroom cavern layer during Hardmode. They are internally classified as enemies, so Battle Potion and Water Candle boost their spawn rate (normal critter-boosting methods do not work). Build a long flat mushroom grass runway in the cavern layer with platforms above to limit escape routes. Lifeform Analyzer detects nearby Truffle Worms. Use Golden Bug Net (faster swing speed) — they burrow away roughly 1 second after you get close. Guide to Critter Companionship prevents accidental kills. Stock 3-5 before fighting Duke Fishron.
QHow should I build the arena? Why 50-tile spacing?
Build 3-5 platform layers directly above the Ocean, each spaced 50 tiles apart vertically. Why 50? Because Cthulhunados are 58 tiles tall — any less spacing and the tornado clips the layer above, trapping you. Bottom layer uses Asphalt Blocks for sprint speed; upper layers must be platforms so you can pass through vertically. Total width should cover the entire Ocean (200-400 tiles). Mark boundaries with solid blocks to prevent accidentally leaving the biome and triggering enrage. Place Campfire and Heart Lantern on every layer. Small honey pool at center — fly through it for a 30-second regen buff.
QWhat does Duke Fishron drop? What changed in 1.4.5?
1.4.5 adds the Electric Eel whip — 150 base damage with a shock tag that triggers chain lightning, devastating in multi-target scenarios. Weapon pool went from 5 to 6, so individual drop rates shifted from 1/5 (20%) to 1/6 (16.67%). The six weapons: Tsunami (bow), Razorblade Typhoon (magic disc), Flairon (flail), Tempest Staff (summon), Bubble Gun (magic rapid-fire), Electric Eel (whip). Fishron Wings drop at 6.67% (Master 10%) — expect 10-15 kills to get them. Expert mode also drops the Shrimpy Truffle — a cute Fishron mount with infinite flight, 82 mph in water, and +15% damage.
QCan you fight Duke Fishron pre-Plantera? When is the best time?
Technically summonable as soon as Hardmode starts. But Duke Fishron in 1.4.5 has 60,000 HP, 50 defense, and 100 base contact damage — pre-Plantera gear makes this near-impossible unless you are mechanically cracked. Safest after Golem — Beetle/Shroomite armor makes Phase 3 survivable. Post-Plantera is doable but Phase 3 will punish you. The sweet spot for skilled players is post-Plantera, pre-Golem — Duke Fishron drops at that point make Golem, Pumpkin Moon, Frost Moon, and Martian Madness all easier.
QWhat are the best weapons for fighting Duke Fishron?
Ranger: Megashark/Chain Gun + Chlorophyte Bullets is the gold standard — auto-homing through Phase 3 invisibility. Melee: Influx Waver (Martian Madness drop) or Terra Blade, plus Flask of Ichor for -15 defense. Mage: Lead with Golden Shower for Ichor debuff, then Razorpine or Bat Scepter for DPS. Spectre Hood lifesteal keeps you alive. Summoner: Xeno Staff UFO minions have the best teleport tracking. Phase 3 note: homing weapons actually lag behind because of teleporting — high burst weapons (Tactical Shotgun, Terra Blade beam) are more effective in the short attack windows.
QWhat is the enrage mechanic? How do you avoid it?
Leave the Ocean surface zone and enrage triggers: horizontally beyond ~400 tiles from map edge, or vertically below the underground layer / less than 50 tiles from the top of the world. Enrage effects: damage doubles, defense doubles (100), speed spikes, Cthulhunados spawn more frequently. His eyes turn red. Enraged Duke Fishron is borderline unwinnable. Prevention: mark arena boundaries, do not fly into the Space layer, do not retreat underground. He will not despawn if you leave the biome — he just enrages.
QWhy is Inferno Potion mandatory for this fight?
Detonating Bubbles are Duke Fishron's most annoying attack — Phase 1 launches 21 per wave, Phase 2 launches 31 in a circling pattern, all of them tracking you at medium speed. Every bubble pops in a single hit from any damage source. Inferno Potion's fire ring auto-destroys any bubble that gets close, requiring zero manual effort. This frees you to focus 100% on dodging charges and Cthulhunados instead of splitting attention to pop bubbles. Phase 2's 31-bubble circling barrage without Inferno Potion is a nightmare.
QWhat is different in Expert and Master mode?
The biggest difference is Phase 3 (below 15% HP invisible teleport dashes) — Classic mode does not have this phase at all. HP scales from Classic 60,000 to Expert 78,000 to Master 99,450. Expert mode contact attacks have a 33% chance to inflict Bleeding (stops natural regen) or Feral Bite (randomly applies Darkness/Confused/Slow debuffs + 20% damage boost but reduced healing). Obsidian Shield blocks Feral Bite side effects. Expert drops the Shrimpy Truffle mount (infinite flight + 82 mph in water). Master mode bumps Fishron Wings drop rate to 10%.
QWhen is the best time to fight Duke Fishron? Why farm him repeatedly?
The ideal window is post-Plantera to post-Golem — you have Shroomite/Spectre armor and Duke Fishron drops steamroll everything after. Farming is worth it: Fishron Wings at 6.67% need multiple kills; Tsunami and Razorblade Typhoon remain top-tier all the way to Moon Lord; Tempest Staff is the best summon weapon before Lunar Events; 1.4.5's Electric Eel whip deals 150 base damage with chain lightning. Every single drop is a noticeable power spike. The repeated kill efficiency is extremely high.
Stats
1.4.5 HP is 60,000. Defense decreases per phase: 50 (P1) → 40 (P2) → 0 (P3). Expert/Master contact applies Bleeding or Feral Bite debuffs.
⚠️ Warning: Duke Fishron has 60,000 HP in 1.4.5 (Expert 78,000 / Master 99,450). Defense drops per phase: 50→40→0, but damage keeps scaling up. Check your gear tier before engaging!