Dreadnautilus Complete Guide
Blood Moon Mini-Boss — Sanguine Staff Farming & Strategy
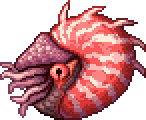
Boss Overview
The Dreadnautilus drops the Sanguine Staff — the strongest summoner weapon before Plantera. With only 24 defense and predictable patterns, this is a fight you can win early in Hardmode if your arena is right.
| Normal | Expert | Master | |
|---|---|---|---|
| HP | 7,000 | 14,000 | 21,000 |
| Contact Damage | 55 | 110 | 165 |
| Blood Bullet Damage | 60 | 120 | 180 |
| Defense | 24 | 24 | 24 |
| Sanguine Staff Drop | 50% | 100% | 100% |
Expert mode guarantees the Sanguine Staff drop. If you can switch to Expert for one kill, do it — then switch back.
How to Encounter

Wait for Blood Moon
Blood Moon has an 11.11% chance every night in Hardmode (1/9). Can also be forced with a Bloody Tear.

Fish During Blood Moon
Cast your line in any water body. Each catch has a 1/6 chance (1/3 with Chum Caster) to spawn a Blood Moon enemy.
Dreadnautilus Appears
The Dreadnautilus spawns from the water. It cannot be despawned by leaving—only by dying, killing it, or dawn breaking.
Encounter Conditions
- Must be in Hardmode
- Must be during a Blood Moon event (7:30 PM to 4:30 AM)
- Any water body works — ocean, underground, or a 300+ tile pool
- Chum Caster doubles the spawn rate from 1/6 to 1/3 per catch
- Can be triggered multiple times per Blood Moon night
- Water body needs at least 300 connected tiles (75 blocks wide × 4 deep)
Fishing Optimization
Your fishing setup directly controls how many Dreadnautilus spawns you get per Blood Moon. The Chum Caster alone doubles your chance from 1/6 to 1/3 per catch.
Doubles Blood Moon enemy spawn rate from 1/6 to 1/3 per catch. The single biggest upgrade for Dreadnautilus farming.

50 fishing power. Higher fishing power means faster catches, which means more spawn attempts per night.
+15 fishing power for 8 minutes. Stack with bait for maximum catches per Blood Moon.
Shows what's on the hook before reeling in. Lets you skip trash catches and only reel in enemies.
Get the Chum Caster from Blood Moon fishing before farming Dreadnautilus. It drops from regular Blood Moon catches and makes the entire process twice as fast.
Your fishing pool needs at least 300 connected water tiles (roughly 75 blocks wide × 4 blocks deep) to count as a valid fishing spot.
Arena Setup

Platform Bridge
100+ blocks long, 30-40 blocks above the water surface. This is your main dodge space.

Campfire
Place every 40 blocks along the bridge for life regen coverage. 0.5 HP/sec adds up in a long fight.

Heart Lantern
Stacks with Campfire regen. Place alongside campfires for a combined 1.5 HP/sec passive healing.

Bast Statue
+5 defense in its radius. Place at the center of your bridge where you'll be fighting most.

Honey Pool
A thin layer of honey (1 block) on a platform gives Honey buff on contact — extra 1 HP/sec regen.
Asphalt Blocks
Top your bridge with asphalt for 50% faster run speed. Crucial for dodging the spinning charge attack.
Fishing Pool
Build a 300+ tile pool (75 blocks wide × 4 deep minimum) near the bridge to trigger the encounter.
Build your platform bridge above a body of water so you can quickly fish to trigger the boss, then fight on the bridge with room to dodge.
Post-1.4.4: Blood bullets pass through blocks. Do NOT build a box — you need an open bridge with maximum dodge room.
1.4.4 Changes
The 1.4.4 update fundamentally changed this fight. Blood bullets now penetrate walls, making the old box strategy useless. Know these changes before you go in.
Blood Bullets Pass Through Blocks (1.4.4)
The old box/bunker strategy is completely dead. Before 1.4.4 you could sit in a box and tank blood bullets with block protection. Now you must dodge everything in the open.
Expert Mode Drop Rate: 100% (1.4.4)
Sanguine Staff is guaranteed in Expert and Master mode. You only need one kill. This makes Expert mode the most efficient way to farm.
Mobility Meta Shift (1.4.4+)
With block protection gone, movement speed and dash accessories became essential. Asphalt bridges and Shield of Cthulhu went from optional to mandatory.
Battle Strategy
Attack Patterns
Spinning Charge
The Dreadnautilus spins toward the player at high speed. It deals 55 contact damage (Normal) and can chain multiple charges. Becomes more frequent below 50% HP.
- Dash perpendicular to the charge direction — Shield of Cthulhu or Tabi
- Asphalt runway gives enough speed to outrun it on foot
- Jump and change direction mid-air to break its tracking
Blood Bullet Barrage
Fires a spread of blood projectiles that deal 60 damage (Normal). Post-1.4.4, these bullets pass through solid blocks. Box strategies no longer work.
- Stay above the Dreadnautilus to reduce the bullet spread angle
- Blood bullets travel in a predictable arc — weave between gaps
- Shield of Cthulhu dash gives i-frames to pass through a volley
- Post-1.4.4: blocks do NOT protect you anymore — stay mobile
Blood Squid Summon
Summons Blood Squids that chase the player. Maximum 5 squids alive at once. Each squid has 600 HP and deals 40 contact damage.
- Kill squids immediately — they stack up and overwhelm you fast
- Piercing weapons (Daedalus Stormbow, Blade Staff) handle squids efficiently
- Squids have no knockback resistance — knock them back while focusing the boss
Class Strategies
Melee
Melee
- Shadowflame Knife has infinite range and auto-aims — the safest melee option
- Titanium set bonus gives Shadow Dodge (1 free hit dodge every 30 seconds)
- Fetid Baghnakhs works if you can tank hits, but risky against blood bullets
- Stay mobile on the platform bridge — never stand still
Ranged
Ranged

- Daedalus Stormbow + Holy Arrows is the strongest option — arrows rain from above
- Onyx Blaster is a solid backup with high single-target burst
- Megashark with Crystal Bullets for sustained DPS if you lack a Stormbow
- Keep maximum distance — ranged has the luxury of full bridge length
Magic
Magic
- Sky Fracture fires 3 homing swords — great for hitting a moving target
- Crystal Serpent is another option with homing split projectiles
- Bring Mana Flower + Greater Mana Potions to avoid running dry mid-fight
- Magic Cuffs accessory restores mana when taking damage — useful in this fight
Summoner
Summoner

- Spider Staff minions latch onto the boss — consistent DPS with no aiming needed
- Blade Staff hits fast and works well with armor penetration via Ichor Flask
- Use Firecracker or Cool Whip to apply whip tag damage to the boss
- Focus entirely on dodging — your minions do the work
- This is THE fight for Summoner — Sanguine Staff is your pre-Plantera endgame
Loot & Drops
5 drops total. The Sanguine Staff is why you're here — everything else is a bonus. Blood Tear lets you trigger future Blood Moons on demand.

The reason you fight this boss. Sanguine Bats are the strongest pre-Plantera summon — they home aggressively, fly through walls, and have no limit on range. Carries you all the way to Plantera.

Summons a Blood Moon on demand. Lets you farm the Dreadnautilus without waiting for the random 1/9 chance each night. Stack these up.
Fishing consumable that creates a chumming effect, increasing fishing power in the area. Useful for general fishing runs.
Decorative furniture that creates a Blood Moon visual effect. Purely cosmetic but looks cool for base building.
Grants +50% damage and -25% damage taken against the Dreadnautilus. Speeds up repeat farming significantly.
Readiness & Timing
Check this list before your first attempt. Missing any of these and you'll be wasting Blood Moon nights.

Titanium / Adamantite Armor
Titanium set bonus (Shadow Dodge) is preferred. You need full Hardmode armor — anything less and blood bullets will two-shot you.

Wings
Any Hardmode wings work. Leaf Wings are the easiest to get early on. Wings are non-negotiable for dodging the spinning charge.

Dash Accessory
Shield of Cthulhu or Tabi. The i-frames from dashing through attacks are your main survival tool against bullet barrages.
Queen Slime Benchmark
If you can beat Queen Slime comfortably, you're ready for Dreadnautilus. Similar difficulty tier but Dreadnautilus has more projectile pressure.
The Dreadnautilus does NOT despawn if you run away — it chases you until dawn (4:30 AM). If you're not ready, you're trapped in the fight.
Dreadnautilus does not despawn. Once it spawns, you fight until one of you dies or dawn breaks at 4:30 AM.
Summary & Tips
Follow these steps for a clean Dreadnautilus kill. Preparation wins this fight.
Get the Chum Caster first — it doubles your spawn rate from 1/6 to 1/3. You'll get twice as many attempts per Blood Moon.
Build a 100-block asphalt bridge with Campfire + Heart Lantern + Bast Statue. Mobility is your survival.
Post-1.4.4, blocks don't protect you from blood bullets. No box strategies — dodge everything.
Expert mode = 100% Sanguine Staff drop. One kill is all you need.
Bring Ironskin, Regeneration, Swiftness, and Endurance potions. Every buff matters.
Kill Blood Squids immediately. 5 squids + boss projectiles = certain death.
Expert Mode Tip
In Expert mode, the Sanguine Staff is a guaranteed drop. One kill is all you need. Focus on survival over speed — bring every buff potion you have and play it safe.
Frequently Asked Questions
How do you summon the Dreadnautilus in Terraria?
Fish in any water body during a Blood Moon in Hardmode. Each catch has a 1/6 chance (1/3 with Chum Caster) to spawn a Blood Moon enemy, including the Dreadnautilus. Use high fishing power gear for more catches per night.
What is the Sanguine Staff drop rate?
The Sanguine Staff has a 50% drop rate in Normal mode and a 100% drop rate in Expert and Master mode. In Expert+, you only need one kill to guarantee the drop.
What is the best arena for Dreadnautilus?
Build a 100+ block long asphalt platform bridge 30-40 blocks above water. Add Campfires, Heart Lanterns, and a Bast Statue. Include a 300+ tile fishing pool nearby to trigger the encounter.
What is the best weapon to fight Dreadnautilus?
Daedalus Stormbow with Holy Arrows is the strongest option overall. For Melee use Shadowflame Knife, for Magic use Sky Fracture, and for Summoner use Spider Staff or Blade Staff. Post-fight, the Sanguine Staff itself becomes the best Summoner weapon until Plantera.
Does the Dreadnautilus despawn?
The Dreadnautilus does not despawn if you move away from it. It will only disappear when dawn breaks (4:30 AM), when you die, or when you kill it. You cannot escape by running — you must finish the fight or survive until morning.
Do blocks protect against Dreadnautilus blood bullets?
No. Since the 1.4.4 update, blood bullets pass through solid blocks. Box and bunker strategies no longer work. You must dodge all projectiles in the open with movement and dash accessories.